Showing posts with label Sew Along. Show all posts

Sunday, February 12, 2012

Travel Bag Part 2

I am sure you all know this is a Simplicity Sew Along featuring a pattern designed by Suede, a new designer for Simplicity and discovered through the Project Runway series on Lifetime.  You can read more about Suede on his Facebook page and follow along with the Sew For A Cause: Suede Says Red Bag Sew Along by clicking on the links.

On my last post I was very disappointed with the front zippers, and I had ordered regular 7 inch zippers.  Funny what a few days away from a project can do for mental anguish!  I was able to make those zippers work without using the ones I had ordered.  (Well, I like having extras on hand anyway! lol)

Front Zippers
I have the handles on the bag front and have the inside front mesh pocket in place.

Bag Front and Handles
Mesh Inside Front Pocket
I also have the pocket on the back of the bag and the inside back pocket in place. I still need to put in the 28 inch zipper and add the sides. It is coming along quite nicely! I am really getting excited about the bag and ready for my summer trip to the beach!
Back and Outside Back Pocket
Inside Back Pocket
I love that the inside back pocket is actually two pockets.  One smaller then the other and perfect for a curling iron or shampoo....etc.

I hope to be able to do more sewing on my bag today, but I have a ton of laundry to do, so I may not be able to get very much done. Hopefully I will be able to sew some on it this week, but I am often to tired after work to sew. I learned years ago never to sew if I am tired, makes for too many mistakes!

Have a great week!

Happy sewing!

Sunday, January 29, 2012

Making a Travel Bag Part 1


Well this was the first week of the Sew For a Cause: Suede Says Red Bag Sew Along.  I had a lot to do this week, but I did get started on the bag.

I made 6 yards of piping and 6 yards of white 1/2 inch double fold bias tape. I sewed the white webbing on top of the blue webbing for the handles of the bag.  I did get all the pattern pieces cut out, and I stitched the zippers into the front double pleated pocket(three times I might add!).


I have to admit that I had to take the zippers out twice.  I made the mistake of using expandable zippers.  It is a product that has 3 yards of zipper tape and you just cut off what you need and add the zipper pull ( the pulls come with the product and attaching them is a story in itself!) .  I believe this type of zipper will do fine for the zipper around the bag because the ends  will be well hidden, but not so good for the front.  Even though it means taking them out for the third time, I may just do that, and use regular 9 inch zippers.  They are made where you can turn the ends under and these zippers by the yard are made solid.


I am not at all happy with the way they look.  It means I will fall a little behind, but I think it will be worth it and I will be able to catch up pretty quick.  I just don't like the unfinished edges showing like they do.


You really can't see the problem very well in these pictures, but take my word for it, this type of zipper does not create  a polished look for this kind of an application.


I will just have to keep playing with it and see if I can find a way to create a zipper finish that I can accept, but I will  go ahead and order my zippers!

Any ideas or suggestions, if so please comment and let me know!

 See ya soon!

 Happy Sewing!

Sunday, January 22, 2012

Ready to Rock It with Suede!

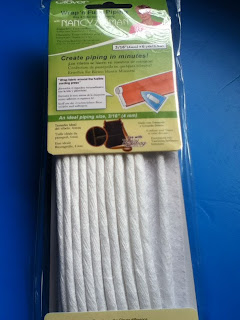
Well the "Suede, Sew For A Cause"  Sew Along will begin on Tuesday, and I have been busy getting my supplies organized. This pattern calls for both bias tape and piping and I will be making both of them. For the Piping I will be using Wrap and Fuse Piping made by Clover and designed by Nancy Zieman of  Nancy's Notions and Sewing With Nancy .


It is really very easy and makes beautiful piping.  You cut a bias strip of fabric 1 and 3/8 inches wide and simply wrap the fabric around the Wrap and Press.  The directions are on the back of the package and are very simple to follow.


The product is simply cording wrapped with fusible web, but the process is much easier then wrapping and sewing the fabric around normal piping cording.


After wrapping the fabric around the Wrap and Fuse, simply press with your iron along the seam allowance using a low to medium setting and No steam.


As you can see from the photos, it turns out great!

Home made bias tape:

You can purchase a Bias Tape Maker from Simplicity. It is really pretty neat, it presses and folds the fabric for you. I actually do own one of these little gems, but I find it is almost as easy to just do it myself. This pattern calls for 1/2 inch double folded bias tape. To make your own start with a bias strip of fabric 1 and 3/4 inches wide. Press that in half.


In this case,  press with a setting as warm as the fabric can handle, and  use lots of steam. After  pressing the entire strip in half,  fold each side in and meet them in the middle (actually, I leave a very small space and do not let them touch in the middle). Press well and fold each side in again, this time I fold and press one side slightly larger then the other. This assures that a little bit of a lip will be formed and when you place the slightly larger side on the under side or wrong side of your fabric, it is sure to be caught in the stitching while stitching it down from the right side of the fabric.


See, easy as pie! I am now ready to start sewing! Let the fun begin! There is still time to join if you would like to make this great travel bag! You can request to join here.  Hope to see you there!

Happy Sewing!